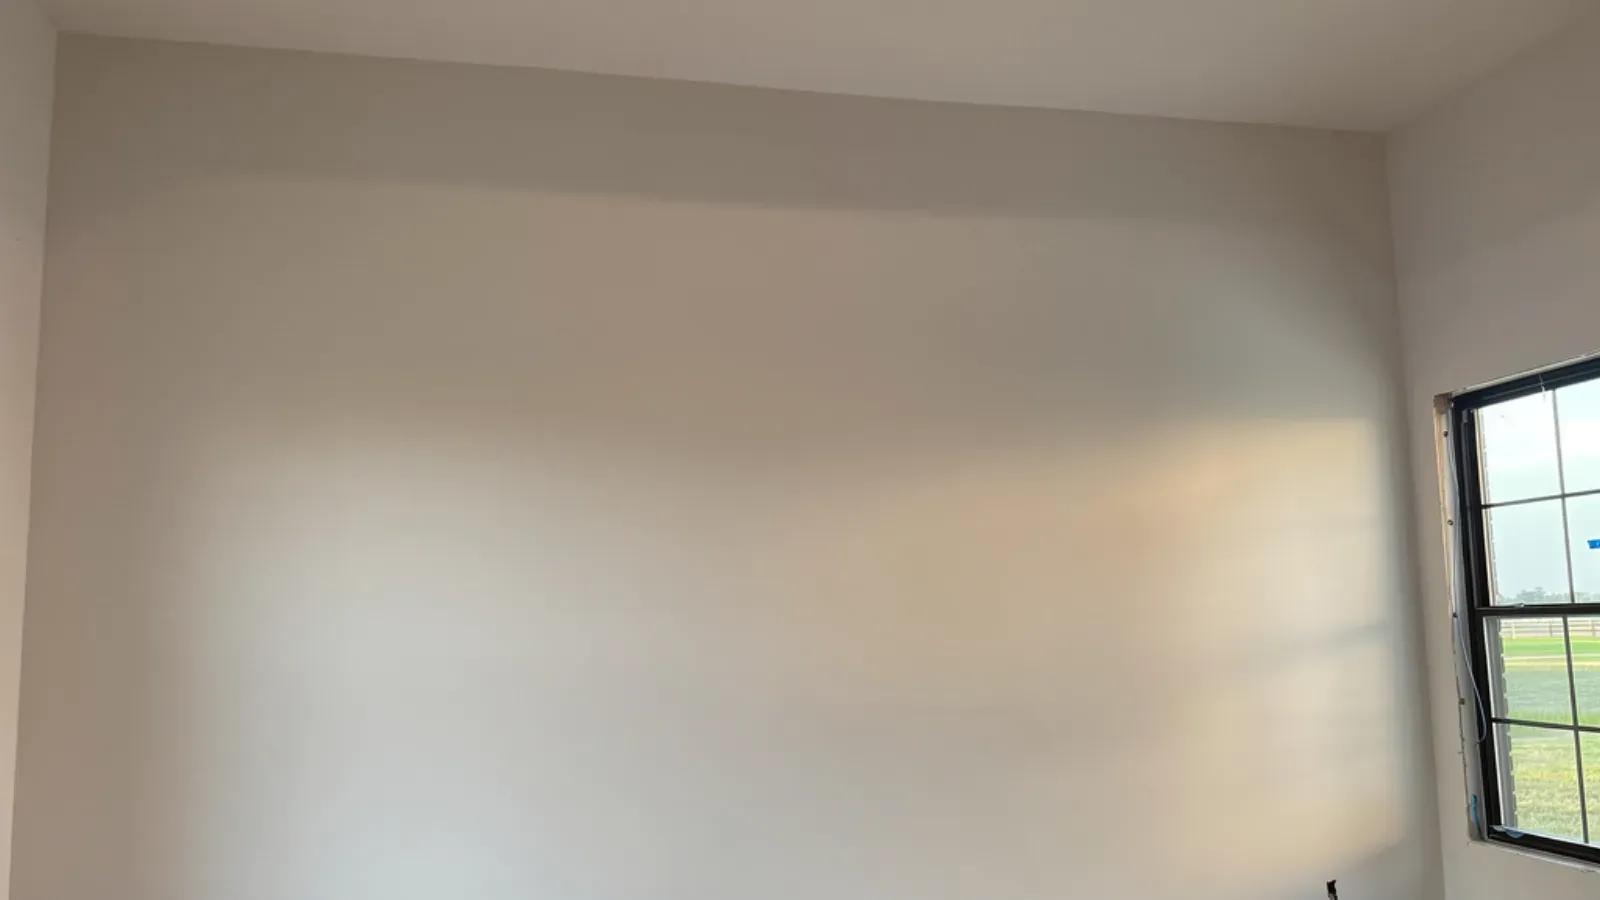
Signs you need this
- • Wall seams, fastener heads, and butt joints "flash" or shadow through the paint the moment low, raking light hits the surface, most obvious on a wall facing large windows or a water view
- • A previous paint job or a builder-grade Level 4 finish looks fine head-on but shows a grid of faint bumps and lines under a hallway sconce or recessed can light
- • Sheen upgrades (satin, semi-gloss, or a designer's specified eggshell) that were meant to brighten a room instead broadcast every imperfection in the board underneath
Why a “finished” wall still shows every joint once the sun hits it
A wall can pass every walkthrough with the lights on overhead and still fail the moment afternoon sun rakes across it from a water-facing window. Norwalk Drywall & Plaster sees this constantly in the waterfront homes we work on around Rowayton, Wilson Point, and Bell Island, where the whole point of the renovation was the glass wall facing the harbor, and that same glass wall is what exposes a standard finish. A Level 4 finish, taped joints and fastener heads coated enough to disappear under normal overhead light, is genuinely the correct spec for most rooms in most houses. It was never designed to survive raking light. The compound built up over a joint sits slightly proud of the field, and light traveling nearly parallel to the wall catches that ridge and throws a shadow line down the seam, the exact geometry a north-facing hallway light never creates. Homeowners often assume something went wrong with the taping. Nothing did. The finish level specified simply wasn’t built for the lighting condition the room ended up with.
This is also why the call usually comes from a designer or architect rather than the homeowner directly. They know to walk a nearly finished room with a flashlight held low and sideways, the same test raking sun will eventually apply for free, and they flag flat seams before the final paint goes on rather than after. We’ve started doing the same raking-light walkthrough ourselves before we ever quote a Level 5 job, because it’s the only honest way to show a homeowner which walls actually need the extra step and which ones don’t. Skimming every wall in a house “just in case” wastes money on planes that will only ever see soft, indirect light. The waterfront window wall, the ceiling under new recessed cans, the accent wall behind a specified high-gloss color: those are the planes where the extra coats earn their keep.
What actually changes between a taped joint and a full skim
A Level 5 finish isn’t a better tape job on the same joints, it’s a different scope entirely. Instead of coating and feathering out from the seam, we run thin coats of joint compound across the entire plane, wall or ceiling, edge to edge, so the finished surface reads as one continuous plane rather than a field with visible joints in it. We check flatness with a straightedge and a raking work light between every coat rather than relying on feel, because a skim that looks flat under overhead shop light can still show ridges once it’s under a window. Humidity off the harbor stretches drying time between coats more than an inland job would need, so we build that into the schedule rather than rushing a coat that hasn’t fully cured, which is how trapped moisture shows up later as cracking or a dull, uneven sheen once paint goes on.
We’re also careful about where Level 5 stops being the right answer. If the substrate underneath is old plaster on wood lath rather than drywall, a skim coat isn’t the fix, that’s a conversion or repair job in its own right, because lath-backed plaster moves differently than a drywall plane and skimming over an unstable substrate just buys a few years before it cracks again. And if the board is freshly hung and simply needs its first set of finish coats before paint, that’s ordinary taping and finishing work at Level 3 or 4, not a full Level 5 resurface of an existing wall. Knowing which of those three jobs we’re actually standing in front of, at every walkthrough, is what keeps a homeowner from paying for a Level 5 finish on a wall that never needed one, and from getting a Level 4 finish on a window wall that was always going to show it.
Materials & standards
Products & materials we use
- USG Sheetrock joint compound
- National Gypsum Gold Bond
- CertainTeed
- setting-type and pre-mixed joint compound
- FibaTape
- corner bead
Standards & codes we work to
- GA-214 finish levels (Level 0-5)
- ASTM C1396 / C840
What the terms mean
- skim coat
- Level 5 finish
- raking light
- flat plane
- critical light
- joint compound
- mud and tape
- finish levels
- texture removal
Options & variants
| Option | When it applies | Cost |
|---|---|---|
| Spot Level 5 skim (problem wall only) | One accent wall, one window wall, or a wall getting new lighting | Lower total cost, priced per wall rather than whole room |
| Whole-room Level 5 skim | Designer-specified rooms, high-gloss or dark paint, waterfront great rooms | Higher labor time per sqft since every plane gets the same pass |
| Ceiling-only Level 5 | Recessed lighting retrofits, vaulted ceilings under skylights | Overhead work drives cost more than wall work of the same area |
| Skim over existing texture (knockdown/orange peel removal) | Homeowner wants to eliminate texture entirely, not just match it | Extra labor to flatten texture before the finish coats go on |
What affects cost
- • Whether the job is one accent wall or a whole room's worth of ceiling and walls
- • How much existing texture has to be skimmed flat before the Level 5 coats even start
- • Access and protection needs in an occupied, furnished home versus a gutted renovation
- • Paint sheen and lighting plan the homeowner or designer has already committed to, since a flatter sheen forgives more than semi-gloss under a can light
- • Drying time between coats, which stretches the schedule in humid coastal air off the harbor
What to expect
- 1
Walk the space in raking light
We walk the space with a work light held at a raking angle, the same way the flaw will show once the room is lit and painted, and mark every wall or ceiling plane that needs the full skim.
- 2
Protect floors, trim, and fixtures
We protect floors, trim, and fixtures, since a skim coat covers the entire plane rather than isolated seams.
- 3
Apply and sand multiple thin coats
We apply and sand multiple thin coats of compound across the full surface, checking flatness with a straightedge and raking light between passes rather than relying on touch alone.
- 4
Final raking-light inspection
We do a final raking-light inspection before we call it done, the same test the homeowner or designer will apply once furniture and lighting go back in.
- 5
Hand off primer-ready
We hand the wall off primer-ready; paint sheen and color are the homeowner's or painter's next step.
When this isn’t the right call
- If the wall is old plaster on wood lath rather than drywall, the right fix is our plaster repair and conversion work, not a skim coat over a substrate that's still moving or delaminating.
- If the goal is just fixing a crack, a nail pop, or a water stain rather than eliminating flash across a whole plane, that's ordinary drywall repair, not a full Level 5 resurface.
- If the wall already has an intentional decorative texture the homeowner wants to keep, texture matching after a patch is the better fit, not a texture-removing skim.
- If the board itself is hung and taped for the first time and just needs its finish coats before paint, that's our drywall taping and finishing work at Level 3 or 4, a shorter process than a full Level 5 resurface.
Frequently asked questions
What's the actual difference between a Level 4 and a Level 5 finish? +
Level 4 is the standard finish behind flat paint on most homes: taped joints and fastener heads coated enough that they disappear under normal light. Level 5 adds a thin skim coat across the entire surface, not just the joints, which is what it takes to hide every imperfection under raking light, a water view, or a glossier paint sheen.
Can you skim coat over our existing walls without tearing anything out? +
Yes, as long as the board underneath is sound drywall. We skim directly over it; there's no demo unless the wall has damage or texture that needs to come off first.
Do we need Level 5 in every room, or just the ones with bad light? +
Just the ones with bad light in most cases. We usually recommend spot Level 5 on the window wall, the wall behind a lighting feature, or wherever a designer has specified a high-gloss or dark color, and standard Level 4 elsewhere.
How long does a Level 5 skim coat take to dry between coats? +
It depends on humidity and how many coats the wall needs; near the harbor, coastal humidity can stretch drying time compared to an inland job, which is part of why we build extra days into a Level 5 schedule.
Will a skim coat fix a wall that already has cracks or nail pops? +
We repair those first, then skim over a stable, sound surface. Skimming over an active crack just hides it temporarily; it will telegraph back through once the wall moves again.
Do you skim coat ceilings, or just walls? +
Both. Ceilings under new recessed lighting are actually one of the most common Level 5 calls we get, since can lights are brutal at exposing old texture and joints overhead.